To add a schedule to a system, complete the following steps.
Prerequisites
-
Schedule Management must be enabled in System Information
-
For areas to be included in Arming (permanent) schedules, Automatic Arming and Automatic Disarming must be turned on for areas in Full Programming > Area Information
-
To create output schedules, an output must be programmed first in Full Programming > Output Information
-
To create favorite schedules, a favorite must be programmed in Virtual Keypad
-
To create door lock/unlock schedules, doors must be enabled in System Information, programmed in Full Programming > Device Setup, and added to System Information > Door Control. For complete instructions, refer to Access Control Doors.
-
If you want to use Sunrise and Sunset times, ensure a Weather Zip Code is programmed in Full Programming > System Options
XR Series
-
Go to Customers.
-
Select the system name.
-
In the menu, go to Schedules.
-
Select the Add icon.
-
Enter a schedule name and number.
-
In Times, enter the begin and end times for the schedule in the appropriate day slots in either 24-hour or 12-hour format. For 12-hour format, enter the time with either AM or PM.
-
To set specific times for holiday schedules, enter them in the holiday slots (Hol A, Hol B, or Hol C).
Note: Holiday schedules can only be created from VirtualKeypad.com or the panel User Menu. To create a holiday schedule, finish configuration in Dealer Admin, then Log In as a Customer.
-
Choose Areas, Outputs, Favorites, and Doors for the schedule, if applicable.
-
In Copy to Systems, select the schedule types to send to the system.
-
Select systems to be affected by the schedule.
-
Select Send Changes to System.
XT Series
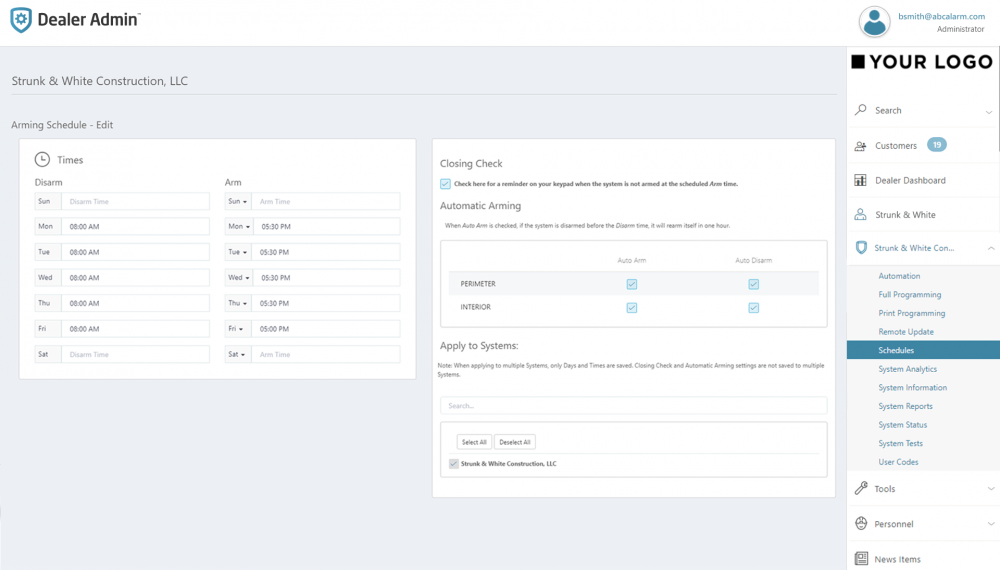
Create an Arming (Permanent) Schedule
You can create one arming schedule per XT Series system. To create a permanent schedule for an XT Series panel, complete the following steps:
-
Go to Customers.
-
Select the system name.
-
In the menu, go to Schedules.
-
In the row of the Arming Schedule, select the Edit icon.
-
Enter days and times for the system to automatically disarm and arm.
-
If you want the keypad to annunciate a reminder when the system is not armed at the schedules time, turn on Closing Check.
-
Select the areas that you want to include in Automatic Arming.
-
In Copy to Systems, select the schedule types to send to the system.
-
Select systems to be affected by the schedule.
-
Select Send Changes to System.
Example: Program the system to disarm automatically at 8:00 AM and arm at 5:30 PM Monday – Thursday.
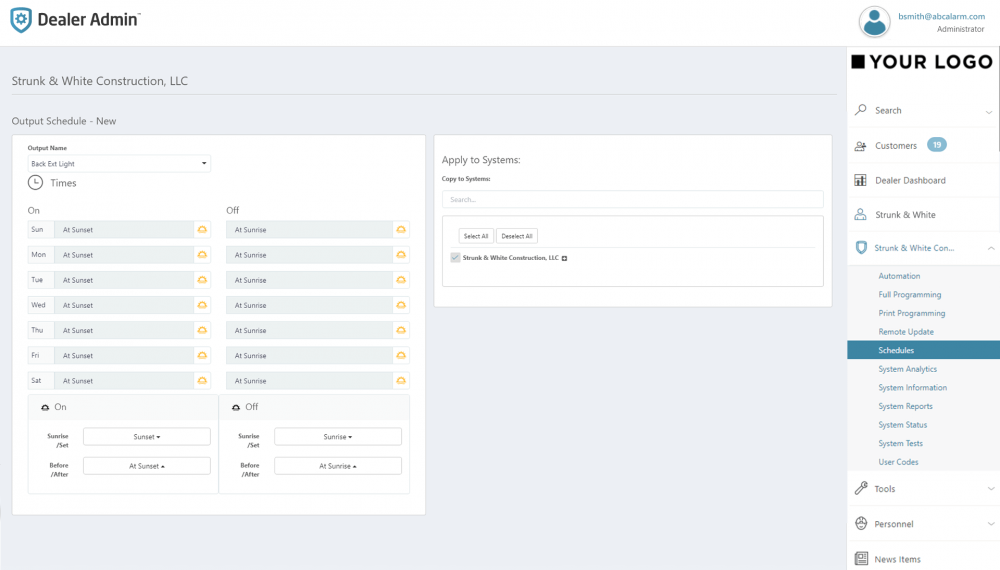
Create an Output or Favorite Schedule
You can create up to 4 output schedules and 20 favorite schedules per XT Series system. To create an output or favorite schedule for an XT Series panel, complete the following steps:
-
Go to Customers.
-
Select the system name.
-
In the menu, go to Schedules.
-
Select Add Schedule, then select the type of schedule that you want to create.
-
Select the output that you want to turn on, turn off, or activate with the schedule.
-
Enter days and times for the output to turn on or off.
-
In Copy to Systems, select the schedule types to send to the system.
-
Select systems to be affected by the schedule.
-
Select Send Changes to System.
Example: Program a schedule so a light turns on automatically at sunset and off at sunrise.